Toggle navigation
STAGE ONE EDUCATION
Getting Started
Fuselage
Fins+Booster
Nosecone
Assembly
Challenges
Start the nosecone
in which we
extrude
sketches
Nosecone Tutorial
Page:
1
|
2
|
3
|
Next
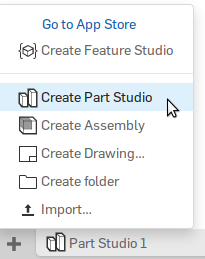
1. Create a new part studio
Click the "
+
" button
Select
Create Part Studio
Video »
▶
||
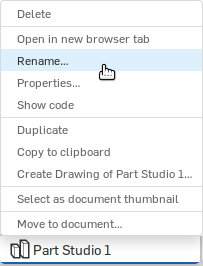
2. Rename your part studio
Right-click on the
Part Studio 1
tab on the bottom left
Select
Rename
Rename it to "
Nosecone
"
You're already thinking of skipping this... but then your future self will be sad...
Video »
▶
||
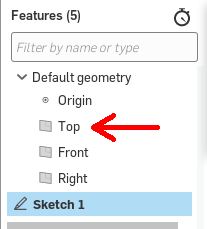
3. Create a sketch
Select the sketch tool
Select a
sketch plane
. Use the
Top
plane.
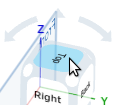
Align your view to the sketch plane by clicking "Top" on the view cube
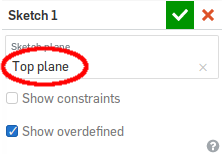
Make sure you have selected the
Top
plane. In the upper right, you should see "Top Plane" under
sketch plane
Video »
▶
||
4. Draw the outer body connector circle
Select the circle tool
Draw a circle.
Be sure to snap it to the origin
.
Video »
▶
||
5. Dimension the outer body connector circle
Select the dimension tool
Click on your circle and set its diameter to
0.706
Video »
▶
||
6. Draw the inner circle
Select the circle tool
Draw a circle inside your first circle.
Be sure to snap it to the origin
.
Select the dimension tool
Click
first
on the outer circle and
then
on the inner circle and set the difference between them to
0.025
Video »
▶
||
7. Extrude the connector
Select the extrude tool
("Sketch 1" will automatically be selected)
Set the
Depth
to
0.6 in
Click the green check
Video »
▶
||
Nosecone Tutorial
Page:
1
|
2
|
3
|
Next


 plane.