Nosecone Tutorial
Page:
1
|
2
|
3
|
Next
2.
Rename your part studio
- Right-click on the Part Studio 1 tab on the bottom left

- Select Rename
- Rename it to "Nosecone"
- You're already thinking of skipping this... but then your future self will be sad...
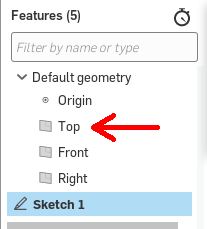
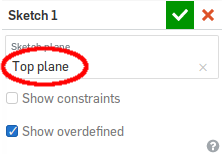
3.
Create a sketch
- Select the sketch tool

- Select a sketch plane. Use the Top
 plane.
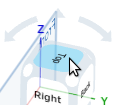
- Align your view to the sketch plane by clicking "Top" on the view cube
- Make sure you have selected the Top plane. In the upper right, you should see "Top Plane" under sketch plane
4.
Draw the outer body connector circle
- Select the circle tool

- Draw a circle. Be sure to snap it to the origin.
5.
Dimension the outer body connector circle
- Select the dimension tool

- Click on your circle and set its diameter to 0.706
6.
Draw the inner circle
- Select the circle tool
- Draw a circle inside your first circle. Be sure to snap it to the origin.
- Select the dimension tool
- Click first on the outer circle and then on the inner circle and set the difference between them to 0.025
7.
Extrude the connector
- Select the extrude tool

- ("Sketch 1" will automatically be selected)
- Set the Depth to 0.6 in
- Click the green check

Nosecone Tutorial
Page:
1
|
2
|
3
|
Next