Engine restraints


in which we stop the engine from undergoing rapid unscheduled disassembly


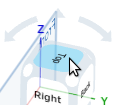
31. Create a plane representing the top of the engine

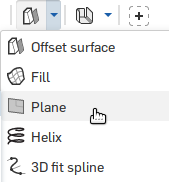
We need to make a stopper so the engine doesn't explode out of the top of the rocket.
  • Start a new plane with the plane tool
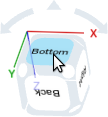
  • Select the bottom face of the rocket
  • If needed, click the "Opposite direction" button to make the plane appear in the middle of the rocket
  • Set the "Offset distance" to 2.9
  • Click the green check
||

32. Start a sketch on that plane

  • Select the sketch tool
  • Click "Plane 1"
  • Select the "Top" of the view cube to align your view with the sketch
||

33. Sketch the engine block

  • Select the circle tool
  • Start the circle on the center point
  • Draw a circle smaller than the rocket
  • Use the dimension tool to set the diameter to 0.6
||

34. Add the rocket's body to your sketch

  • Turn your view slightly
  • Select the Use (Project/Convert) tool
  • Click the inner circle of the rocket
  • You should see that line bold as it becomes part of your sketch
||

35. Extrude the engine stop

  • Select the extrude tool
    • Your sketch will automatically be selected
  • If needed, click the "Opposite direction" button to make the extrude go upwards
  • Set the "Depth" to 0.5
  • Click the green check
||

36. Start engine clip sketch

We need a clip to stop the engine from exploding out of the back of the rocket when the recovery (reverse) charge goes off.
  • Select the sketch tool
  • Start a sketch on the bottom face of the rocket
  • Select the Use (Project/Convert) tool
  • Click the inner circle of the rocket
    • You should see that line bold as it becomes part of your sketch
  • Align your view with the sketch by clicking the Bottom of the view cube
||

37. Sketch the engine clip arc

  • Select the 3-point arc tool
  • Set the points:
    1. Edge of the circle, to the left
    2. Edge of the circle, to the right
    3. Set the radius so the arc curves towards the rocket's center
||

38. Dimension the engine clip arc

  • Select the dimension tool
  • Click the outer circle and then the arc and set the distance to 0.04
  • Use the dimension tool again to set the arc's radius to 0.1
||

39. Constrain the engine clip arc

  • Select the "Vertical" tool
  • Click the arc's center-point and then the origin of the rocket
  • You should see the arc jump to the center
||

40. Trim the engine clip sketch

  • Select the trim tool
  • Trim the bottom of the inner circle
||

41. Extrude the engine clip arc

  • Select the extrude tool
    • Your sketch will automatically be selected
  • If needed, click the "Opposite direction" button to make the extrude go upwards
  • Set the "Depth" to 0.09
  • Click the green check
||

42. Start the sketch for your name

  • Select the Sketch tool
  • Click on flat plane on one of the fins
  • Right-click and select "View normal to sketch plane" to align your view
||

43. Add your name

  • Select the "Text" tool
  • Draw a box near the fin and type your name
  • Select the Roboto Slab font
  • Press the green check
||

44. Constrain your name

  • Select the "Coincident" tool
  • Select the dashed line on the left
  • Select the line on the left of the fin, and you should see the letters jump to line up
  • Repeat with the right side lines
||

45. Dimension your name

  • Select the "Dimension" tool
  • Select the dashed line on the bottom of the letters
  • Select the bottom of the rocket
  • Set the dimension to 0.25
  • Click the green check
||

46. Extrude your name

  • Select the "Extrude" tool
  • Select Sketch 7
  • Set the "Depth" to 0.02
  • Click the green check
||


Next up is the nosecone