Make the fins


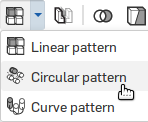
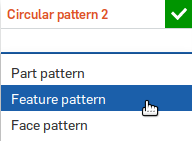
in which we circular pattern the rocket fins

9. Start a sketch on the Right plane

  • Select the sketch tool
  • Select a sketch plane. Use the Right plane.
  • Align your view to the sketch plane by clicking "Right" on the view cube

10. Draw the profile of one fin

  • Select the Line tool
  • Start at the bottom, in the middle of the cylinder, and draw the profile of one fin
  • The exact fin shape can be up to you!
  • Your fin should have these properties though:
    • A flat bottom
    • About as wide/tall as these fins

11. Extrude the fin in both directions

  • Select the extrude tool
  • Click on Add to add to your part instead of creating a new part
  • Set the Depth to 0.05 in
  • Check Second end position
  • Set the second Depth to 0.05 in
  • Click the green check

12. Add fillets to smooth out the fin profile

  • What is a fillet? »
    • Fillet: “a rounding of an interior or exterior corner of a part design.”
  • Select the fillet tool
  • Click the edges on the left, right, top near the body, and top on the fin
  • Set the radius to 0.4
  • Click the green check

13. Add fillets to the fin edges

  • Select the fillet tool
  • Set the radius to 0.05
  • Click the two edges of the fin
  • Click the green check

14. Circular pattern the fins

  • We have one fin, but we really want 3 fins around in a circular pattern.
  • Select the circular pattern tool
  • Select a Feature Pattern from the drop down menu
  • In the left pane, click on Features to pattern and then select Extrude 2 (the extrude for the fins) and the two fillets we just did
  • Select Axis of pattern, and then click the the cylinder
  • Chance the Instance count to 3
  • Check Apply per instance
  • Click the green check

15. Create a sketch on top of the cylinder

  • What we want to do next is clear out the middle of the cylinder, and so we'll make a new sketch to help us get there
  • Select the sketch tool
  • Click on top of the cylinder
  • Notice how a new sketch plane is now on top of the cylinder

16. Use the "Use" tool to get the inner circle in this sketch

  • Select the use tool
  • Select the inner circle of the body
  • To help see what this has done, hide the 3D part
  • Unhide the part

17. Extrude cut away the inside of the cylinder

  • Select the Extrude tool
  • Select Remove to take away rather than add material
  • Where it says Blind, change it to Through all
  • Click the green check
  • Notice how the inside of the cylinder is now perfectly empty
  • Cylinder not empty? »
    • There's a good chance that your direction was mixed up
    • Double click on Extrude 3
    • Click the "opposite direction" button
    • Also check that in the Merge scope box, you see "Part 1"
      • If not, click the Merge scope box and then click the rocket