33.
Add your name
- Select the "Text" tool

- Draw a box near the nosecone and type your name with Enter after each letter
- Select the Roboto Slab font

- Press the green check

34.
Constrain your name
- Select the "Coincident" tool

- Select the point that is the center of the top line above the first letter
- Select the line running down the center of the rocket
- You should see the letters jump to the center
35.
Dimension your name
- Press Esc to deselect the coincident tool
- Drag the dashed line around the letters so that the top is below the top of the rocket
- Select the "Dimension" tool

- Select the top of the box around the first letter
- Select the top of the rocket
- Set the dimension to 0.25
36.
Dimension your name (2)
- Select the "Dimension" tool
- Select the side of the box around the first letter
- Set the dimension to whatever makes all the letters fit on the rocket. It's probably around 0.25
- Make sure the letters don't go below the notch into the smaller diameter section
- Press the green check to finish the sketch
37.
Extrude your name (1)
- Select the "Extrude" tool

- Select Sketch 5

- Change Blind to Up to face
- Click on the box for Up to face (to select it if not already selected)
- Click on the outer surface of the rocket
- Don't press the check yet, we have more options to set below
38.
Extrude your name (2)
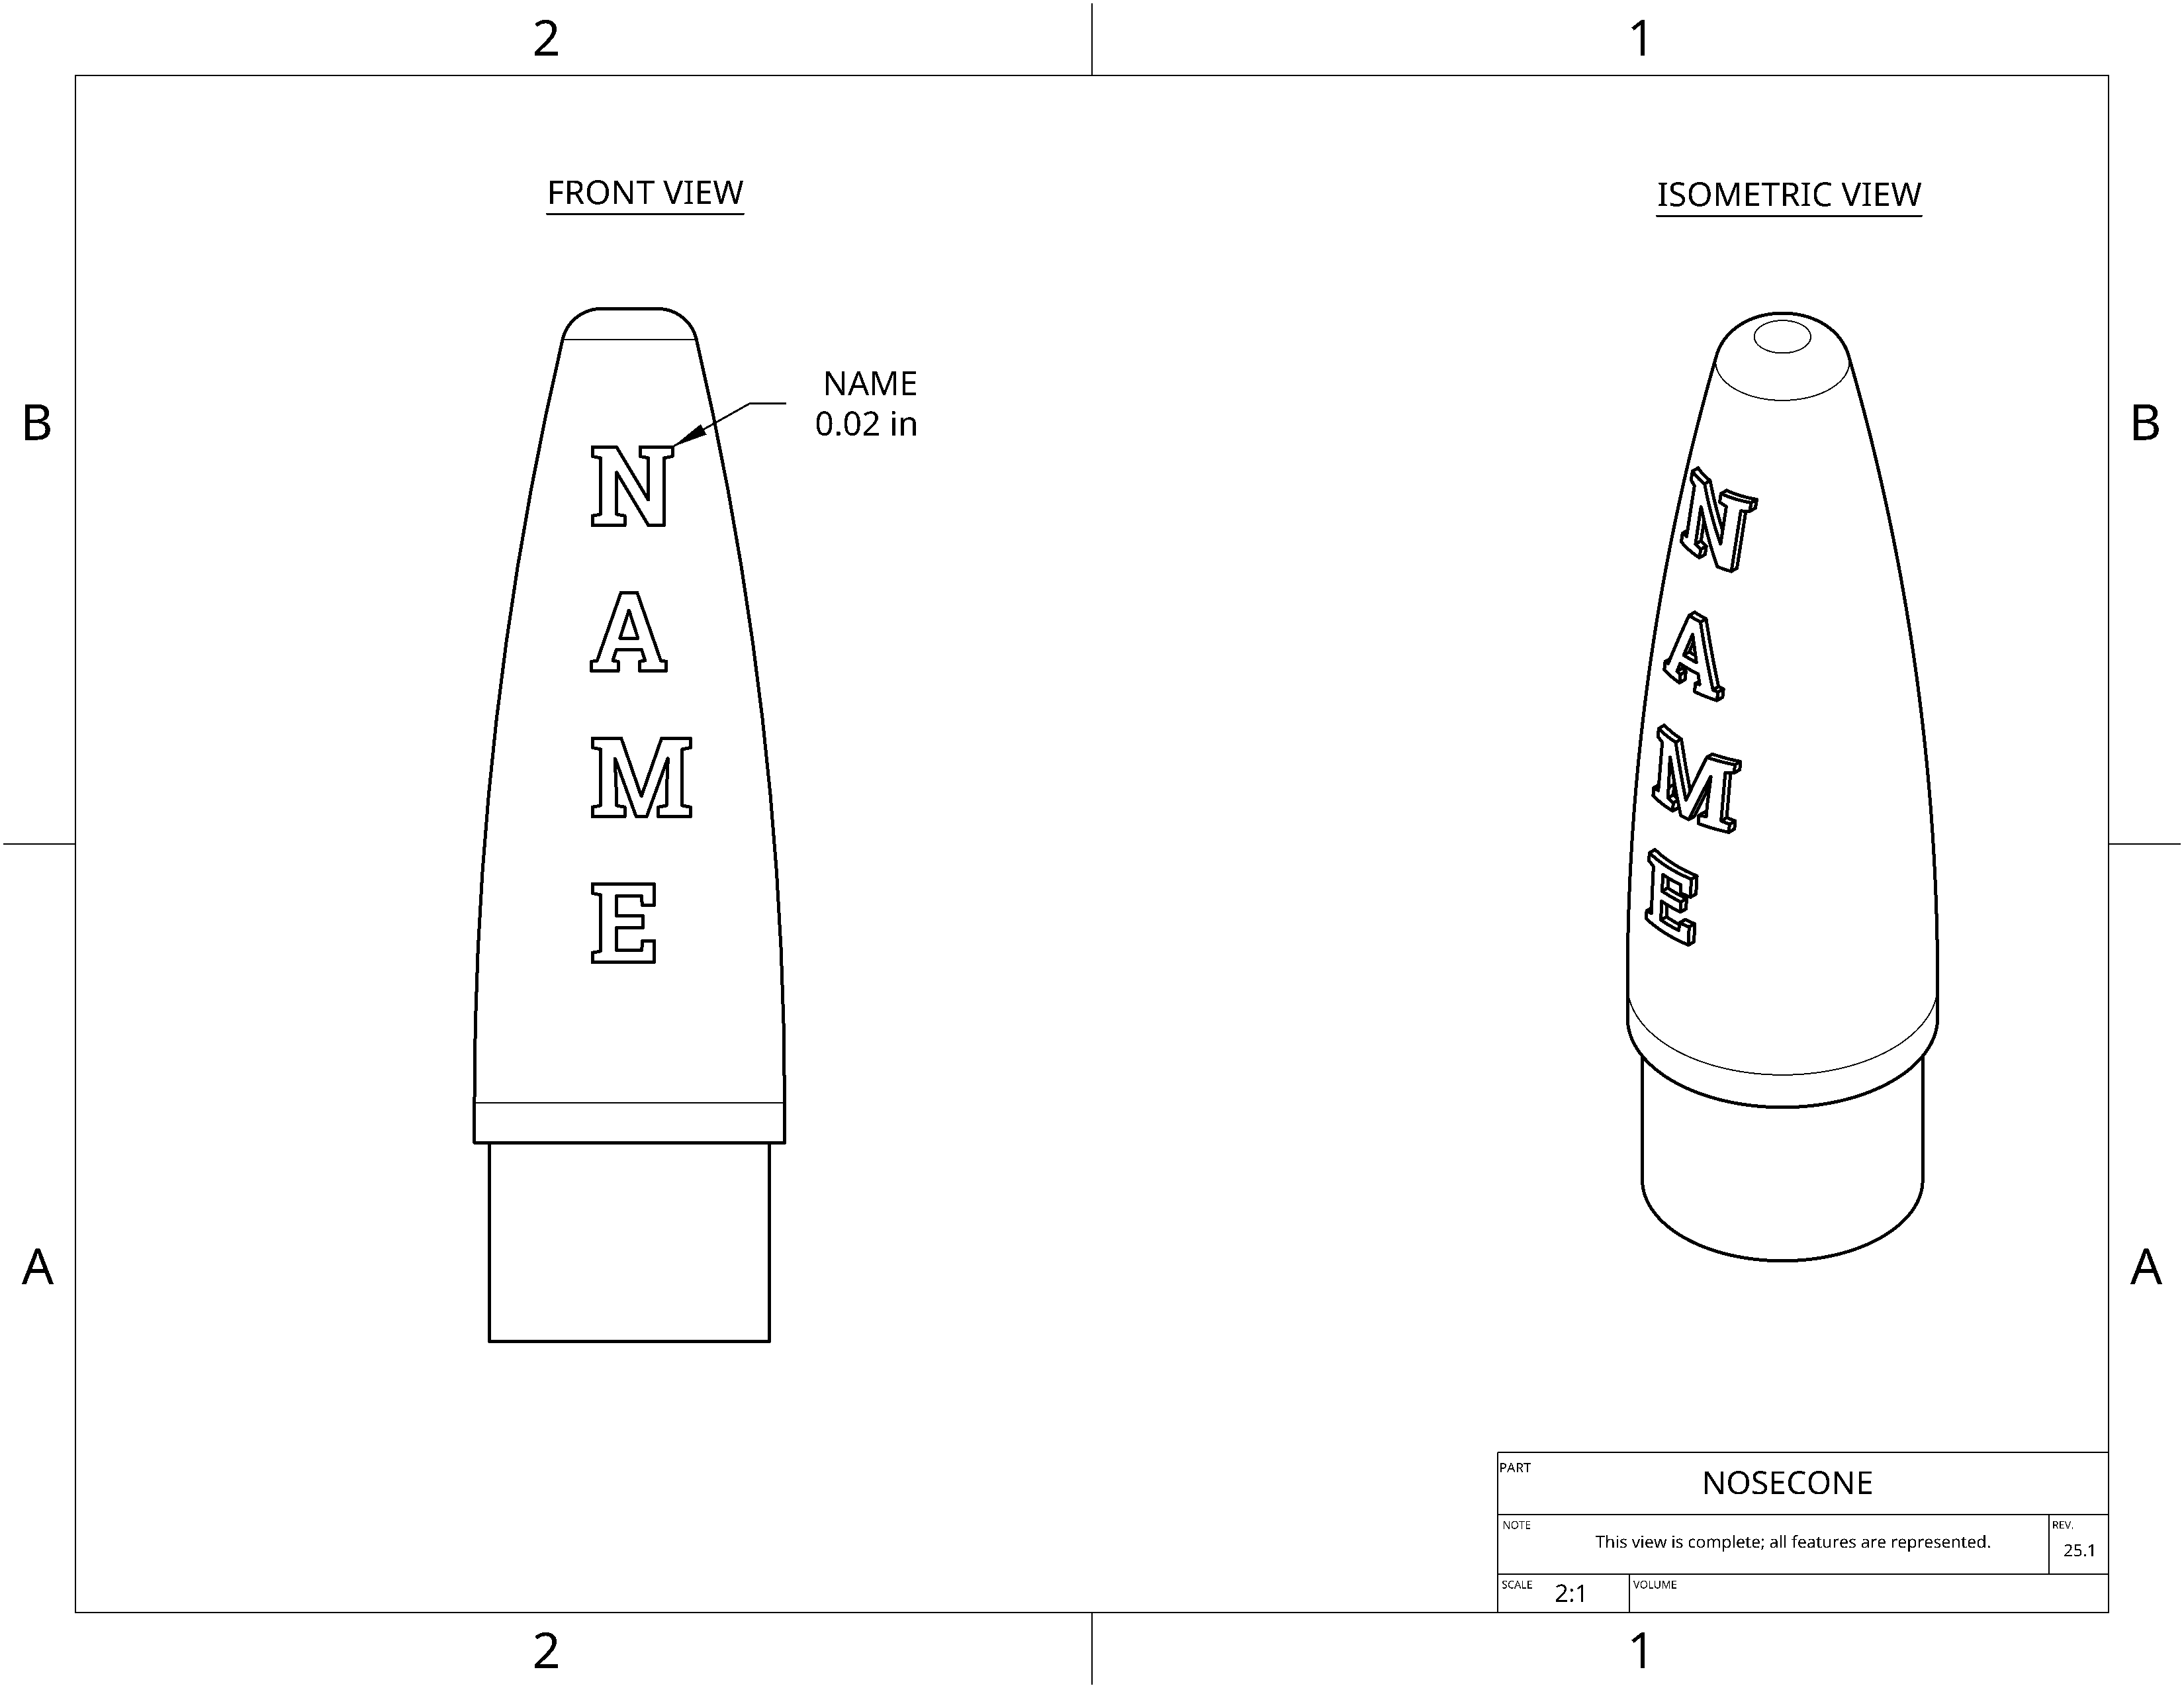
- Still in the extrude menu, set the Offset distance to 0.02
- Press the "Opposite direction" button next to Offset distance

- You should now see your name on the nosecone
- Press the green check
39.
Remove the name extrude from the inside
- Select the "Extrude" tool
- Select Sketch 5 (again)
- Change Blind to Up to face
- Click on the box for Up to face (to select it if not already selected)
- Click on the inside surface of the nosecone
- Select Remove
- You'll see the inside of the nsoecone empty of your name
- Press the green check